"Mastering Bird Photography with Long Lenses"
Bird photography is one of the most rewarding yet challenging fields of wildlife photography. Birds are fast, unpredictable, and often occupy habitats that are difficult to access. To capture sharp, detailed, and compelling images, photographers often rely on long lenses—ranging from 300mm to 800mm or more. Mastering these tools is essential for those who want to transform fleeting encounters with birds into stunning photographs.
This article serves as a comprehensive guide for photographers seeking to enhance their craft with long telephoto lenses. We’ll cover technical considerations, field techniques, equipment choices, and creative approaches to make the most of your gear.
Why Long Lenses Are Essential for Bird Photography
Birds are small and often wary of humans. Approaching them too closely risks disturbing their natural behaviour—or scaring them away entirely. Long lenses allow photographers to:
Fill the frame with the subject while maintaining a respectful distance.
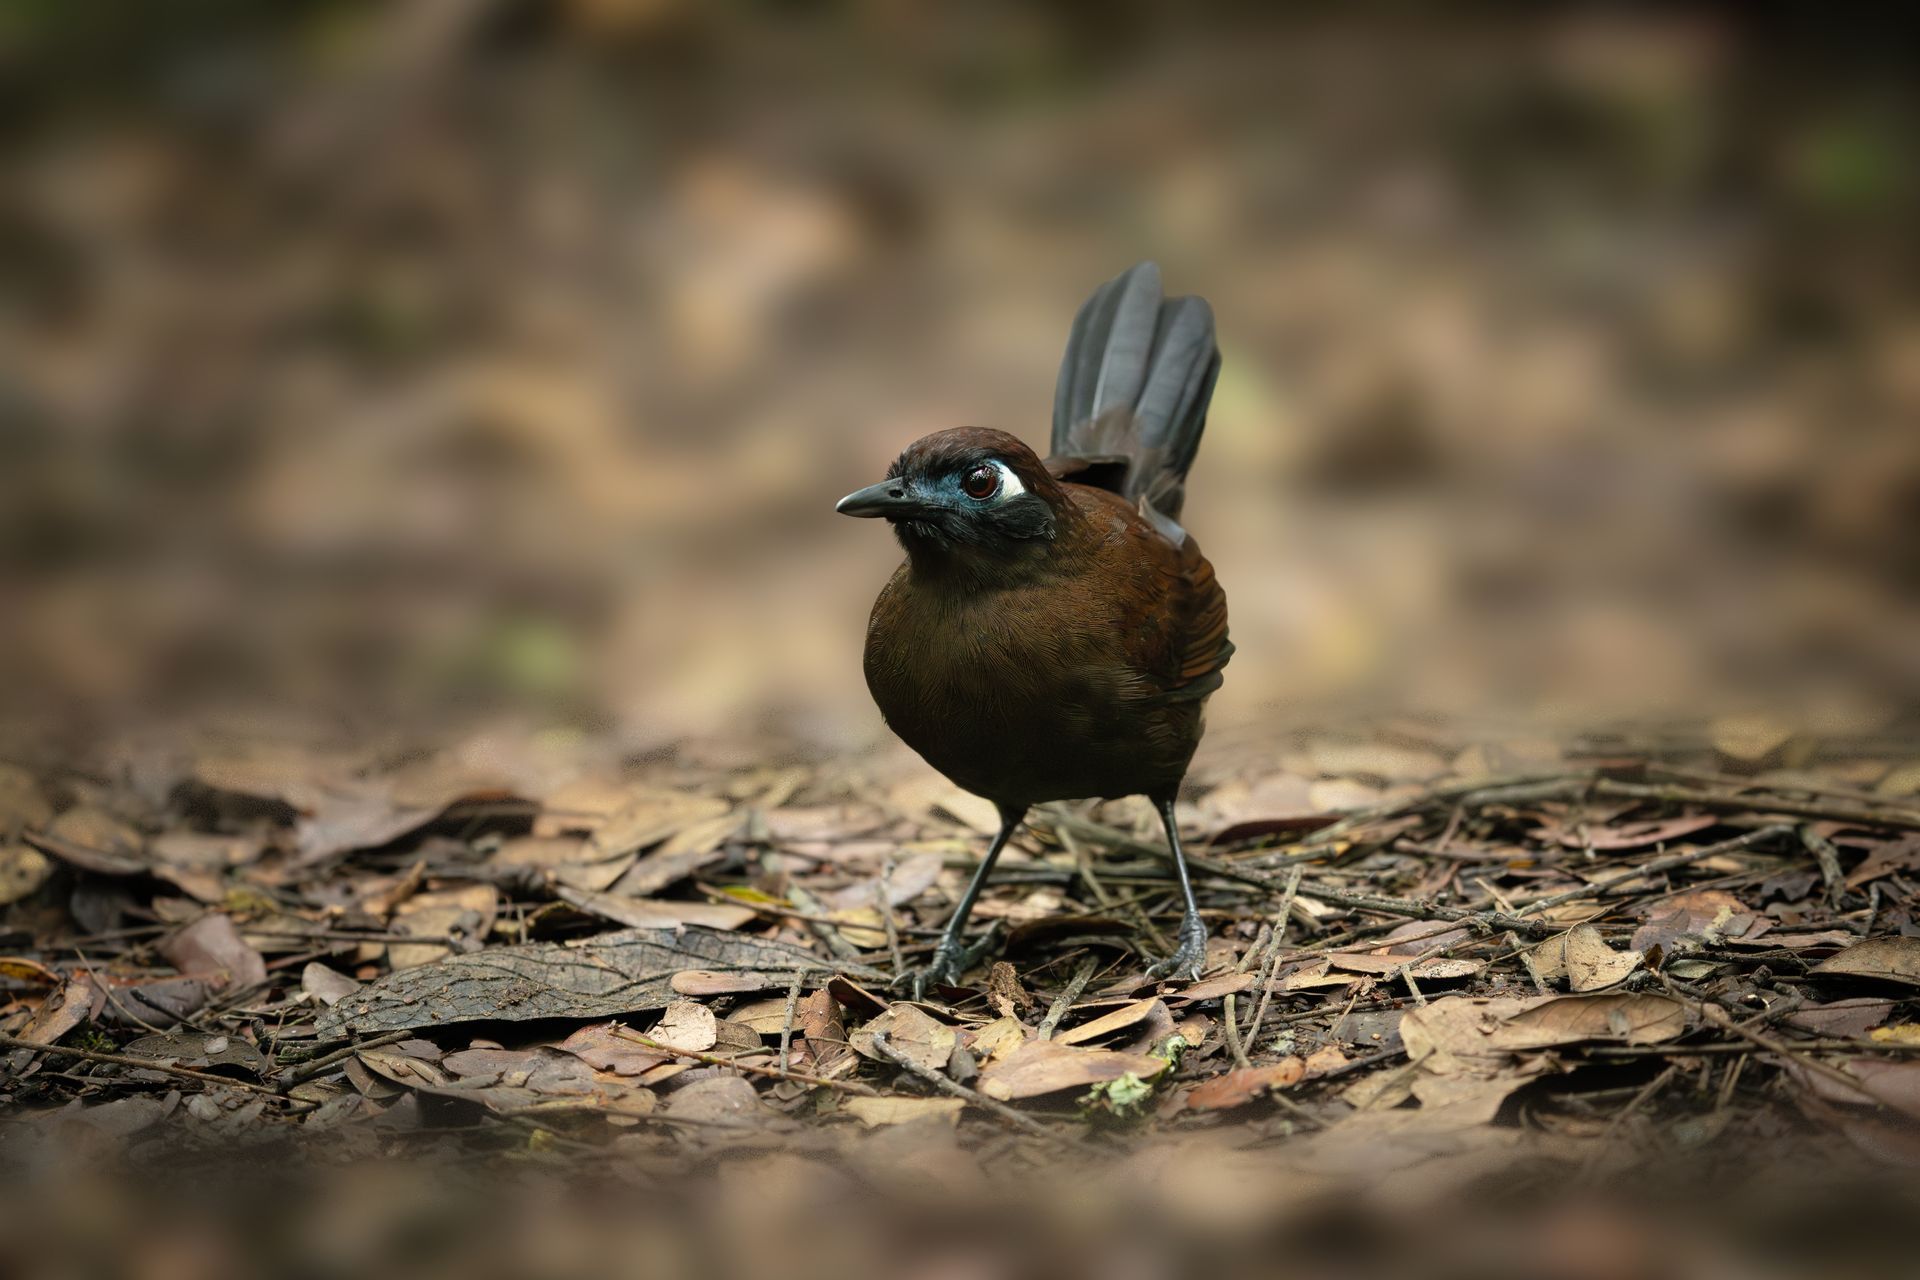
Capture fine details such as feather patterns, eye reflections, and subtle colors.
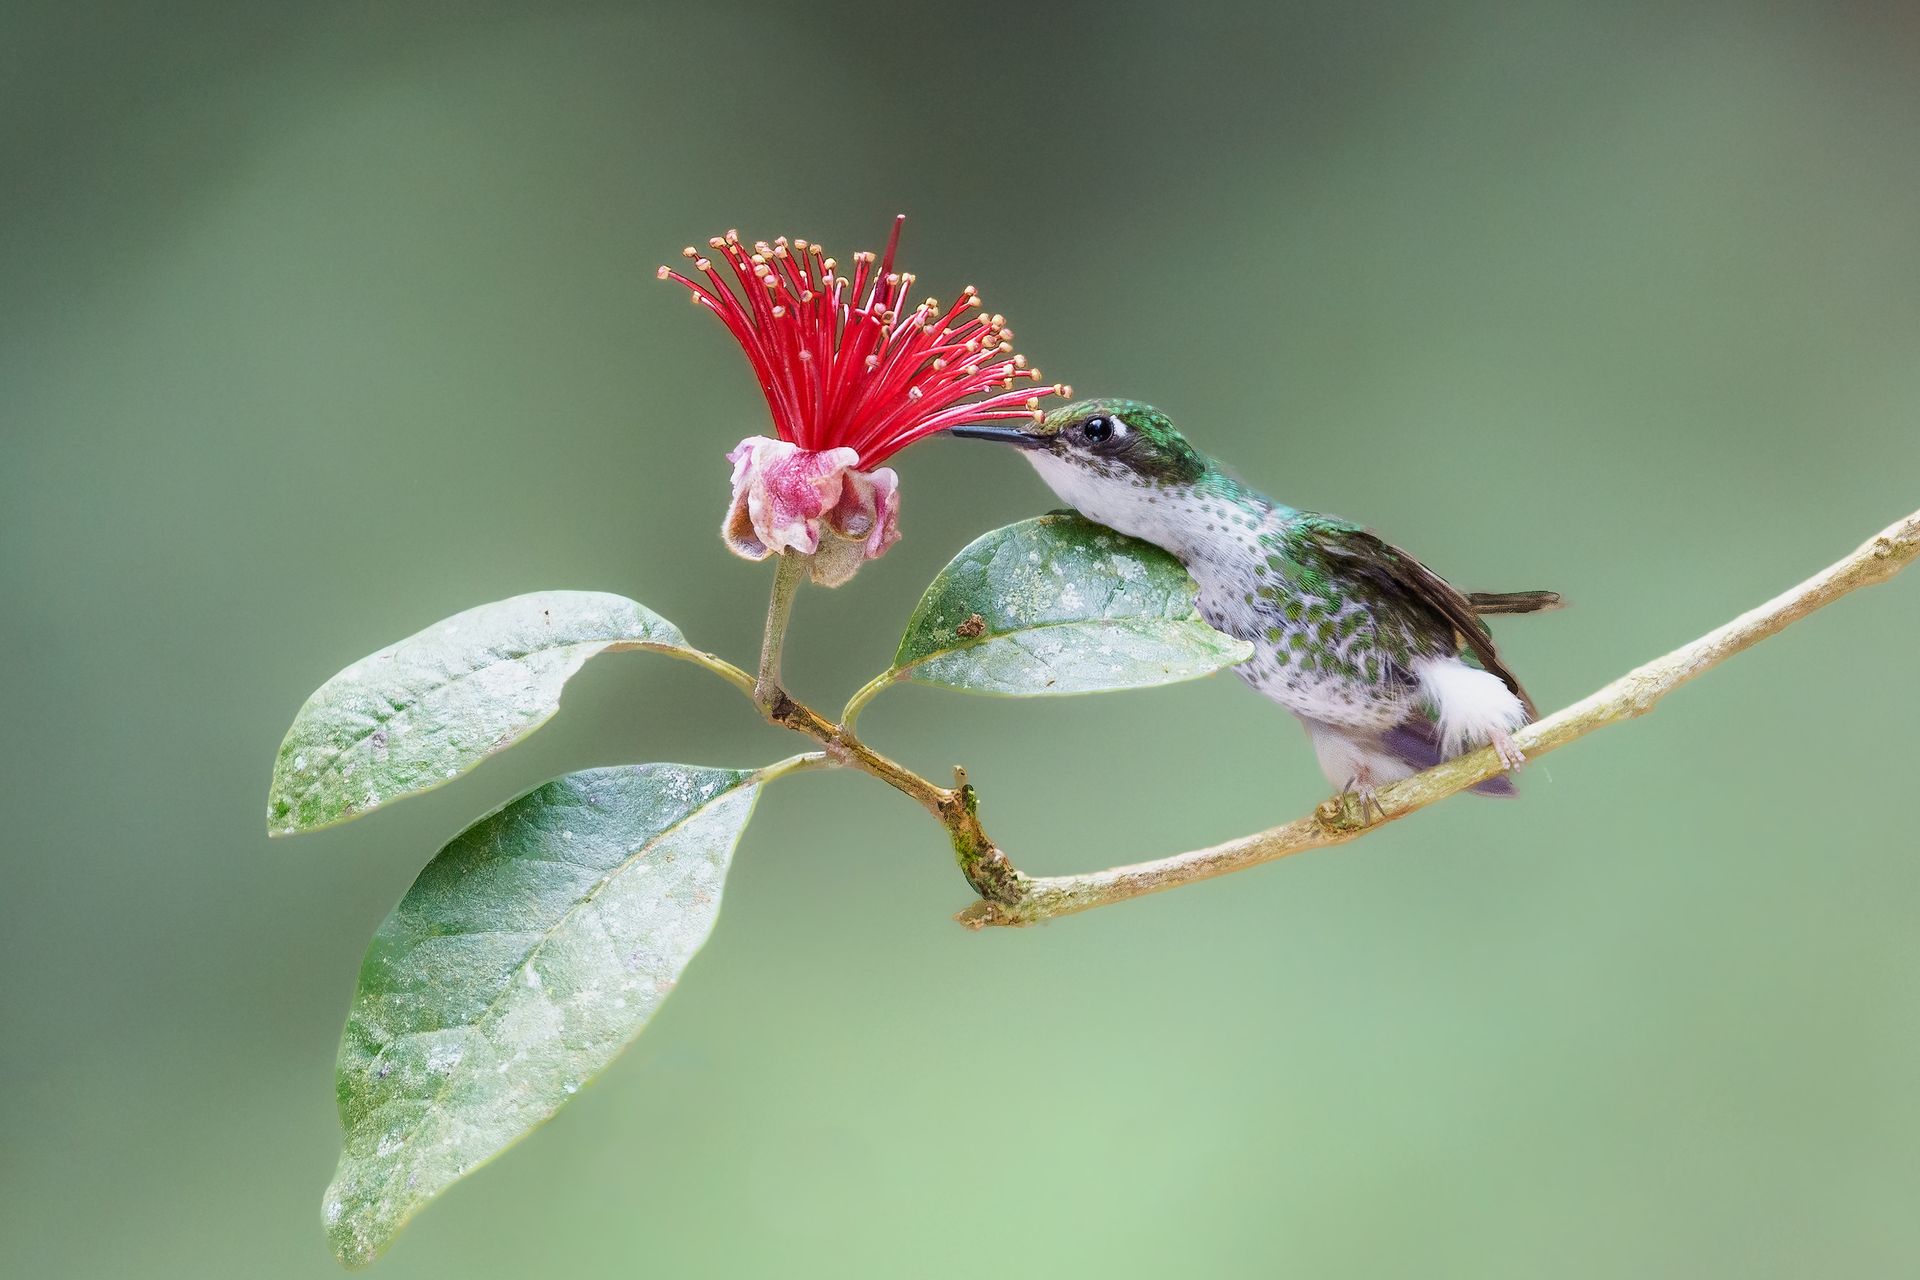
Isolate the subject by creating a creamy background blur (bokeh).
Photograph distant or high-flying birds without losing clarity.
In essence, long lenses bridge the gap between humans and the often-elusive avian world.
Choosing the Right Long Lens
Selecting a lens depends on budget, style, and goals. Let’s break down the common options:
1. Prime Lenses (Fixed Focal Lengths)
Examples: 400mm f/2.8, 500mm f/4, 600mm f/4, 800mm f/5.6.
Advantages: Superior sharpness, wide apertures, excellent background separation.
Disadvantages: Expensive, heavy, and less versatile in framing.
2. Zoom Lenses
Examples: 100-400mm, 200-600mm, 150-600mm.
Advantages: Versatility in composition, lighter, more affordable.
Disadvantages: Slightly less sharp, slower apertures, more distortion at extremes.
3. Using Teleconverters
Extend focal length by 1.4x or 2x.
Pros: Reach distant birds without a new lens.
Cons: Reduces light, may slow autofocus.
4. Mirrorless vs DSLR Lenses
Mirrorless systems (Canon RF, Sony FE, Nikon Z) offer lighter, faster focusing telephotos.
DSLR lenses are heavier but still widely used and often more affordable on the secondhand market.
Mastering Camera Settings with Long Lenses
Using a long lens magnifies both your subject and your mistakes. Precision in settings is crucial.
1. Shutter Speed
Birds move fast, so use 1/1000s or faster for small, active birds.
For perched birds, 1/500s may suffice.
Flight photography often requires 1/2000s or more.
2. Aperture
Wide apertures (f/4, f/5.6) create stunning background blur.
Narrower apertures (f/8, f/11) increase depth of field when photographing flocks or large birds.
3. ISO
Don’t fear high ISO. Modern cameras handle ISO 3200–6400 well.
Better to have a sharp, noisy image than a blurry, clean one.
4. Autofocus Modes
AI Servo/Continuous AF (Canon/Nikon/Sony): Tracks moving birds.
Single Point AF: Critical for accuracy on small birds.
Wide Area AF: Useful for birds in flight.
5. Image Stabilization (IS/VR/OSS)
Crucial for handholding long lenses.
Turn off stabilization when using a tripod.
Techniques for Using Long Lenses in the Field
1. Stability is Key
Use a tripod with a gimbal head for heavy primes.
For zoom lenses, handheld shooting is possible with good technique:
Keep elbows tucked in.
Use your left hand to support the lens barrel.
Lean against a tree or rock for added stability.
2. Panning with Birds in Flight
Practice smooth horizontal movements.
Follow through after pressing the shutter.
Use burst mode to maximize chances of capturing the wings at a perfect angle.
3. Approach and Positioning
Move slowly and avoid sudden movements.
Use natural cover (trees, bushes, hides).
Position yourself with the sun behind you for better light and catchlights in the bird’s eyes.
4. Background Control
Long lenses compress the background, turning clutter into smooth gradients.
Change your angle to eliminate distractions.
5. Eye Contact and Composition
Always focus on the eye—sharp eyes create a strong connection with the viewer.
Rule of thirds applies: leave space in the frame in the direction the bird is looking or flying.
Common Challenges with Long Lenses
1. Weight and Fatigue
Carrying a 500mm f/4 all day is exhausting.
Solutions:
Use a monopod or tripod.
Build strength with short practice sessions.
Consider lighter zooms for travel.
2. Heat Haze and Atmospheric Distortion
Long distances exaggerate haze.
Shoot in the early morning or late afternoon when the air is cooler.
3. Minimum Focusing Distance
Some long lenses can’t focus on nearby subjects.
Be aware of your lens limitations and step back if necessary.
4. Cost
Prime telephotos can cost as much as a small car.
Renting before buying is wise.
Creative Approaches with Long Lenses
Long lenses aren’t just about close-ups—they can be tools for creativity.
1. Silhouettes and Backlighting
Shoot against rising or setting sun for dramatic outlines.
2. Behavioral Photography
Use reach to capture feeding, mating, or nesting behaviors without interference.
3. Flight Shots
Wings fully spread against a clear sky make striking images.
Practice on gulls or common birds before rare species.
4. Storytelling Through Habitat
Step back and include parts of the environment for context.
Even with long lenses, composing wider shots is possible.
Case Study: Photographing a Kingfisher with a 600mm Lens
One of the best examples of long lens mastery is photographing the elusive kingfisher. These small, fast birds require patience and technical skill.
Setup: A 600mm f/4 on a gimbal head, pre-focused near a perch.
Technique: Wait silently, using camouflage or a blind.
Result: Pin-sharp detail of feathers with background completely blurred, highlighting the bird’s vibrant colors.
Tips from Professionals
Know Your Subject: Study bird behavior to anticipate movements.
Be Patient: Birds rarely perform on command; wait quietly.
Shoot in Bursts: Capture a sequence of wing positions.
Experiment with Angles: Don’t always shoot from eye level; try ground-level or elevated shots.
Respect Wildlife: Never stress or bait birds unnaturally.
Post-Processing Long Lens Images
Even with perfect technique, post-processing is essential:
Sharpening: Apply selectively to feathers and eyes.
Noise Reduction: Particularly for high-ISO shots.
Cropping: Long lenses help, but strategic cropping can improve composition.
Exposure Adjustments: Ensure whites aren’t blown out (critical for egrets, gulls, etc.).
Conclusion
Mastering bird photography with long lenses is both a technical and creative journey. These tools open up a world where feathers, flight, and fleeting moments can be frozen in incredible detail. With the right lens choice, careful settings, and field techniques, photographers can elevate their craft and capture the avian world like never before.
Whether you’re just starting with a 100-400mm zoom or investing in a professional 600mm f/4 prime, the principles remain the same: patience, practice, and passion. With dedication, your long lens will not only bring distant birds closer but also transform them into works of art.